1、个人电脑IDL安装过程

2、IDL相关天文库安装过程


个人电脑IDL安装过程

下载idl71linux.x86.tar.gzlicense.dat
1、root登录,在/usr/local/下建立安装目录;

      mkdir /usr/local/itt

2、将idl71linux.x86.tar.gz文件复制上述目录下;

      cp  /usr/local/itt/

3、将idl71linux.x86.tar.gz解压缩;

      tar xvfz idl71linux.x86.tar.gz

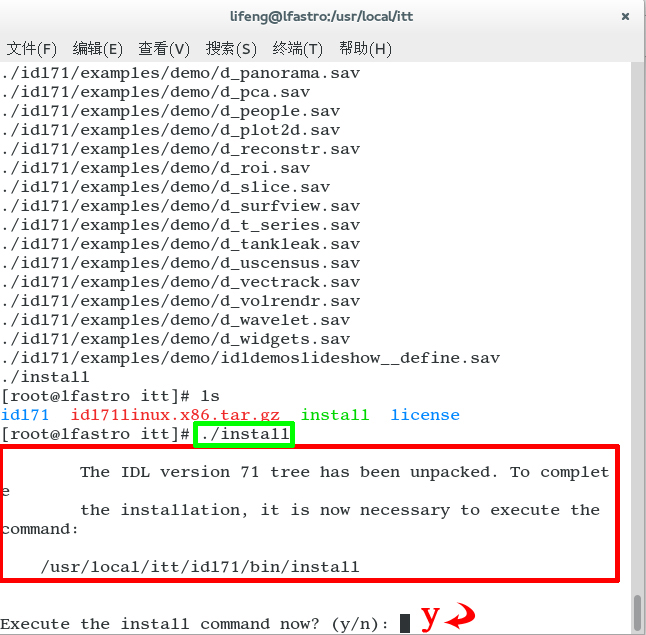
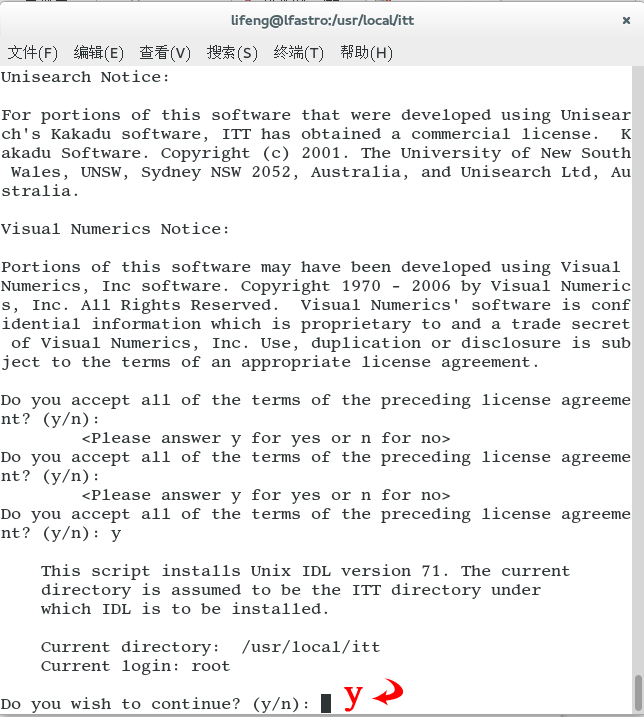
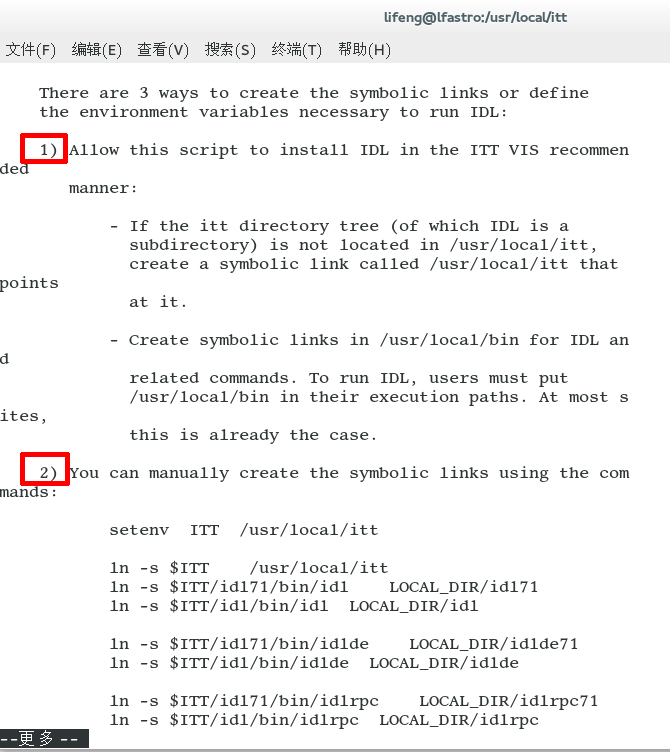
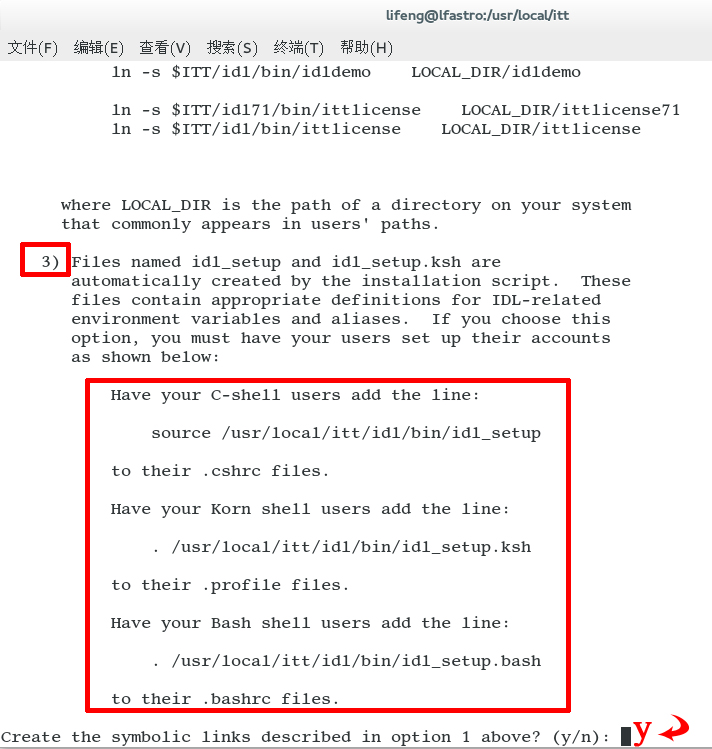
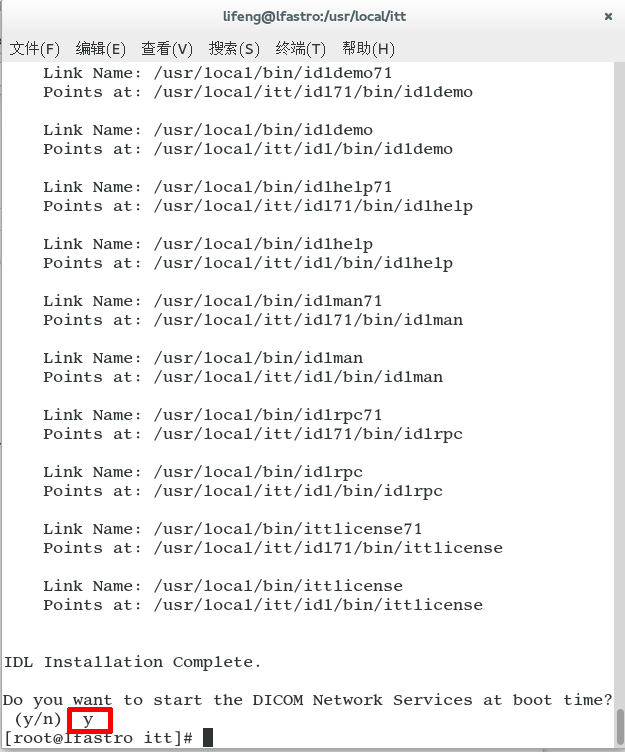
4、运行安装文件,一路狂点y,最后选择用第3种方法设置环境变量;

      ./install


5、安装license

      cp license.dat /usr/local/itt/idl71/license/

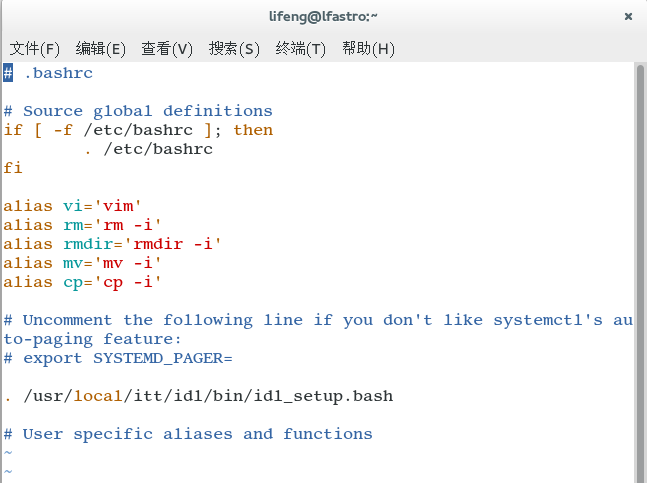
6.对于C-shell,在.cshrc中加上 . /usr/local/itt/idl71/bin/idl_setup.ksh 然后source .cshrc ( 对于Bash shell,在.bashrc中加上 . /usr/local/itt/idl71/bin/idl_setup.bash
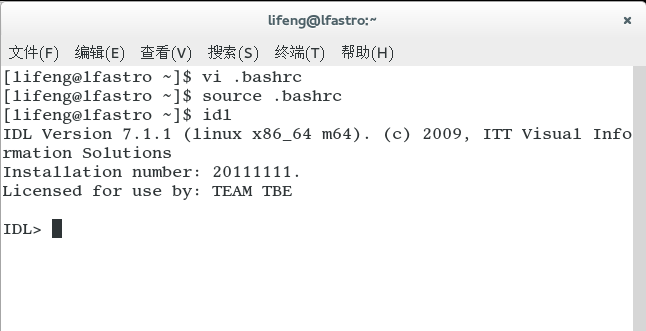
 然后source .bashrc);

    我的linux系统是Bash shell

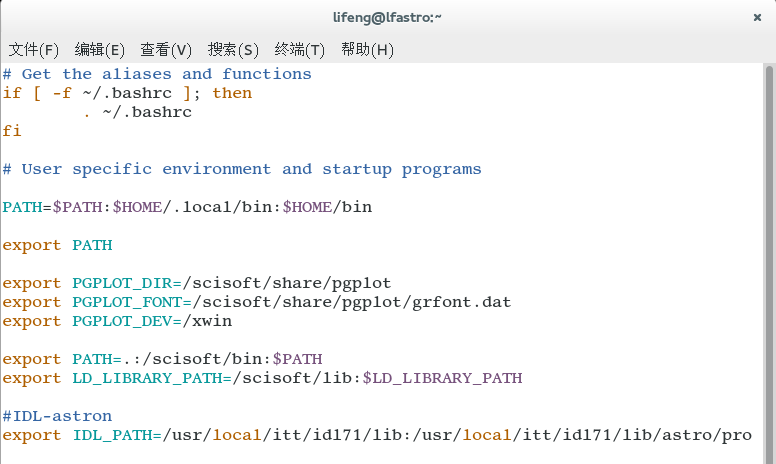
    所以,在/home/lifeng/主文件目录下的.bash_profile中加上路径,保证调用库文件时可以找到;

      export IDL_PATH=/usr/local/itt/idl71/lib:/usr/local/itt/idl71/lib/astro/pro

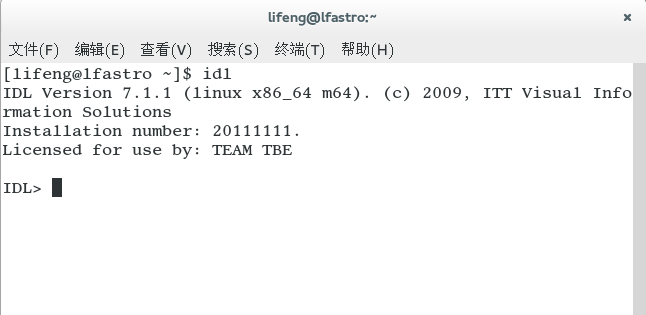
7.运行idl ( 输入 idl 后回车 )
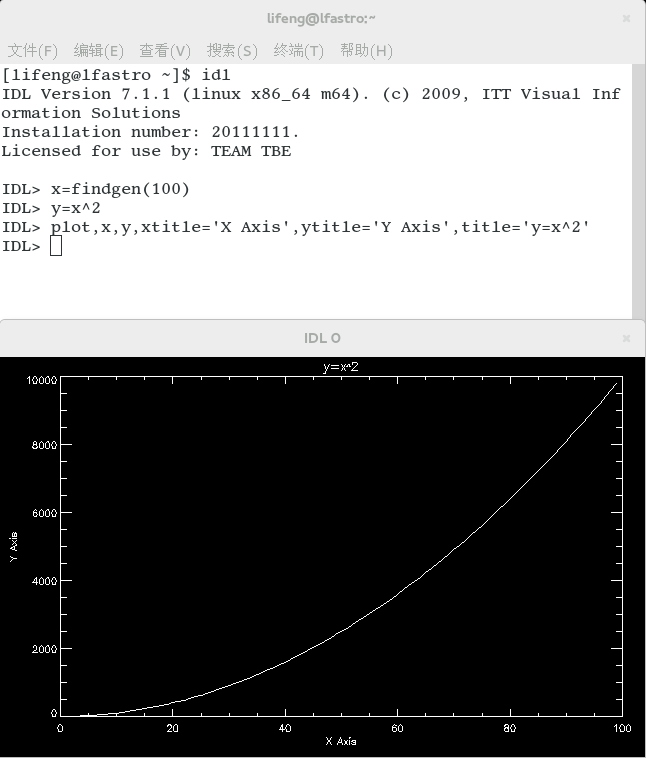
 

8.简单示例:画出y=x^2曲线

      IDL> x=findgen(100)
      IDL> y=x^2
      IDL> plot,x,y,xtitle='X Axis',ytitle='Y Axis',title='y=x^2'


      如果输出~.ps格式文件,简单可改为:
      IDL> x=findgen(100)
      IDL> y=x^2
      IDL> thisDevice=!D.Name
      IDL> set_plot,'ps'
      IDL> plot,x,y,xtitle='X Axis',ytitle='Y Axis',title='y=x^2'
      IDL> Device,/close_file

idl_example1.ps

附:

1、IDL系列教程(来自本站)

2、2011年ESRI北京站IDL视频教程(全)

3、IDL颜色值表 RGB颜色值和十六进制颜色码转换 IDL下的颜色模式  

☆☆☆☆☆☆☆☆☆☆☆☆☆☆☆☆☆☆☆☆☆☆☆☆☆☆☆☆☆☆☆☆☆☆☆☆☆☆☆☆☆☆☆☆☆☆☆☆☆☆☆☆☆☆☆☆☆☆

IDL天文库安装过程

1、安装astron包
(1)进入“The IDL Astronomy User's Library”http://idlastro.gsfc.nasa.gov/网页下面的http://idlastro.gsfc.nasa.gov/ftp/下载astron.dir.tar.gz或astron.tar.gz或astron.zip解压到astro文件夹,
包含:data,pro,text文件夹及aaareadme.txt,contents.txt,news.txt文件;
(2)把astro文件夹考到/usr/local/itt/idl71/lib下,
      sudo chmod 777 -R astro
(3)在.bash_profile里添加路径:
      export IDL_PHTH=/usr/local/itt/idl71/lib:/usr/local/itt/idl71/lib/astro/pro
      source .bash_profile

2、安装idlutils,idlspec2d,specflat,photoop等
总地址:http://spectro.princeton.edu/
下载地址:http://spectro.princeton.edu/tarballs/
安装方法:http://spectro.princeton.edu/idlspec2d_install.html
编译方法:
(1)进入/usr/local/itt/idl71/lib/,将文件上述几个文件包copy到此处解压:
      tar xvf idlutils-v5_3_0.tar
      tar xvf idlspec2d-v5_2_0.tar
      tar xvf specflat-v1_6.tar
      tar xvf photoop-v1_7_14.tar

(2)设置路径:
      IDLUTILS_DIR=/usr/local/itt/idl71/lib/idlutils
      IDLSPEC2D_DIR=/usr/local/itt/idl71/lib/idlspec2d
      SPECFLAT_DIR=/usr/local/itt/idl71/lib/specflat
      PHOTOOP_DIR=/usr/local/itt/idl71/lib/photoop


      PATH=$IDLUTILS_DIR/bin:$SPECFLAT_DIR/bin:$IDLSPEC2D_DIR/bin:$PHOTOOP_DIR/bin:$PATH

      IDL_PATH=+$IDLUTILS_DIR/goddard/pro:$IDL_PATH
      IDL_PATH=+$IDLUTILS_DIR/pro:$IDL_PATH
      IDL_PATH=+$IDLSPEC2D_DIR/pro:$IDL_PATH


(3)进入idlutils文件夹:
      cd /usr/local/itt/idl71/lib/idlutils/bin
其中有一个evilmake可执行文件,执行
      ./evilmake
会看到突突突一大推编译的过程……

OK!    


☆☆☆☆☆☆☆☆☆☆☆☆☆☆☆☆☆☆☆☆☆☆☆☆☆☆☆☆☆☆☆☆☆☆☆☆☆☆☆☆☆☆☆☆☆☆☆☆☆☆☆☆☆☆☆☆☆☆

附: